Welcome to this series.
Instead of giving you one giant blog post, I give you multiple smaller ones. You can decide if you read all of it or jump to the more advanced stuff in the later sections of the series.
This post serves as the introduction and gives you an overview of what to expect in each of the parts. It will also tell you about some of the conventions I use throughout the series and how to run the code examples.
Table of contents
What is it all about?
This series will give you an overview of how you can work with tabular data in the world of vanilla JavaScript.
Vanilla???
Vanilla JavaScript really just refers to plain JavaScript: no extra libraries, no framework, nothing.
And no: no ice cream involved.
If you are familiar with other programming languages such as Python or R, you might have some expectations about what a programming language delivers in terms of data manipulation tools.
Well, let me tell you a good thing and a bad thing.
The good thing
You can do a lot with the help of basic vanilla JavaScript array-methods. This is what this series will show you. If needed, you can use libraries like D3 or tidy.js to go even further.The bad thing
You can not do the same amount of stuff out of the box as in Python or R. But then again, these two languages kind of specialize in data (wrangling), while Javascript always had a different scope.
In the past, I have spent a lot of time on working with data in R. When I started learning JavaScript, I often found myself wondering how to do certain tasks that I knew how to do in R. So I took some notes that formed the basis for what you are reading now.
Let’s go through a quick breakdown of the separate parts of this series.
Brief contents of each post
Data Wrangling in JS: 01 Basics
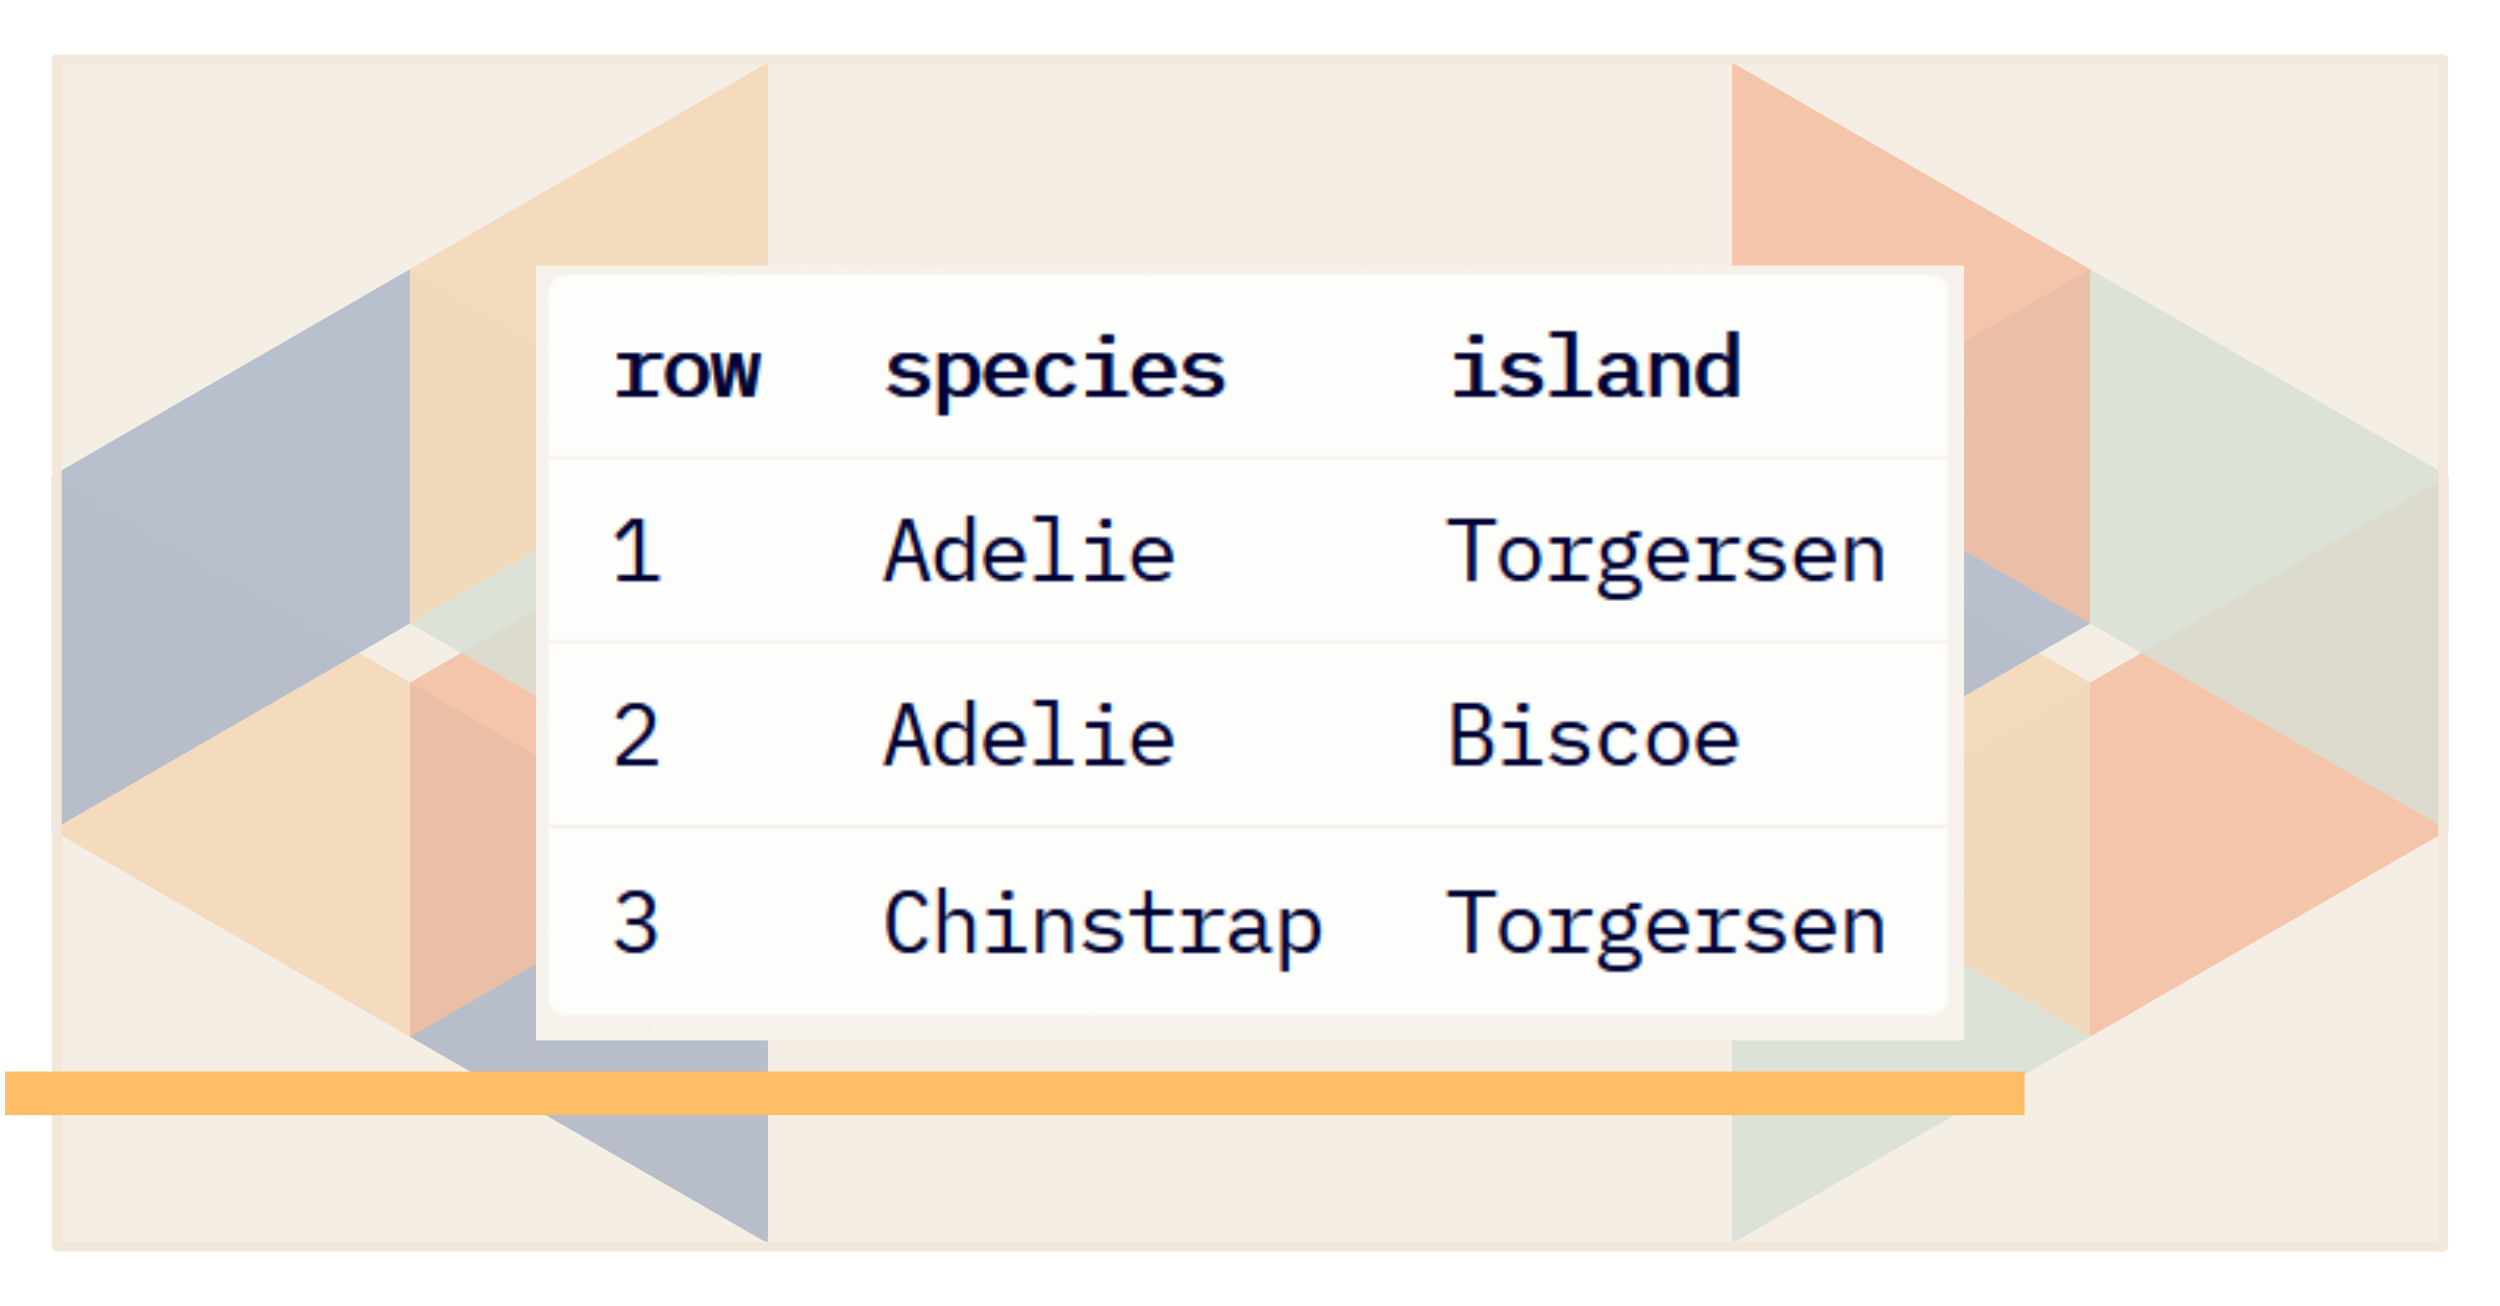
The first part will introduce basic terminology to talk about tabular data and how that is typically represented in JavaScript. Arrays and Objects are introduced.

Data Wrangling in JS: 02 Array Methods
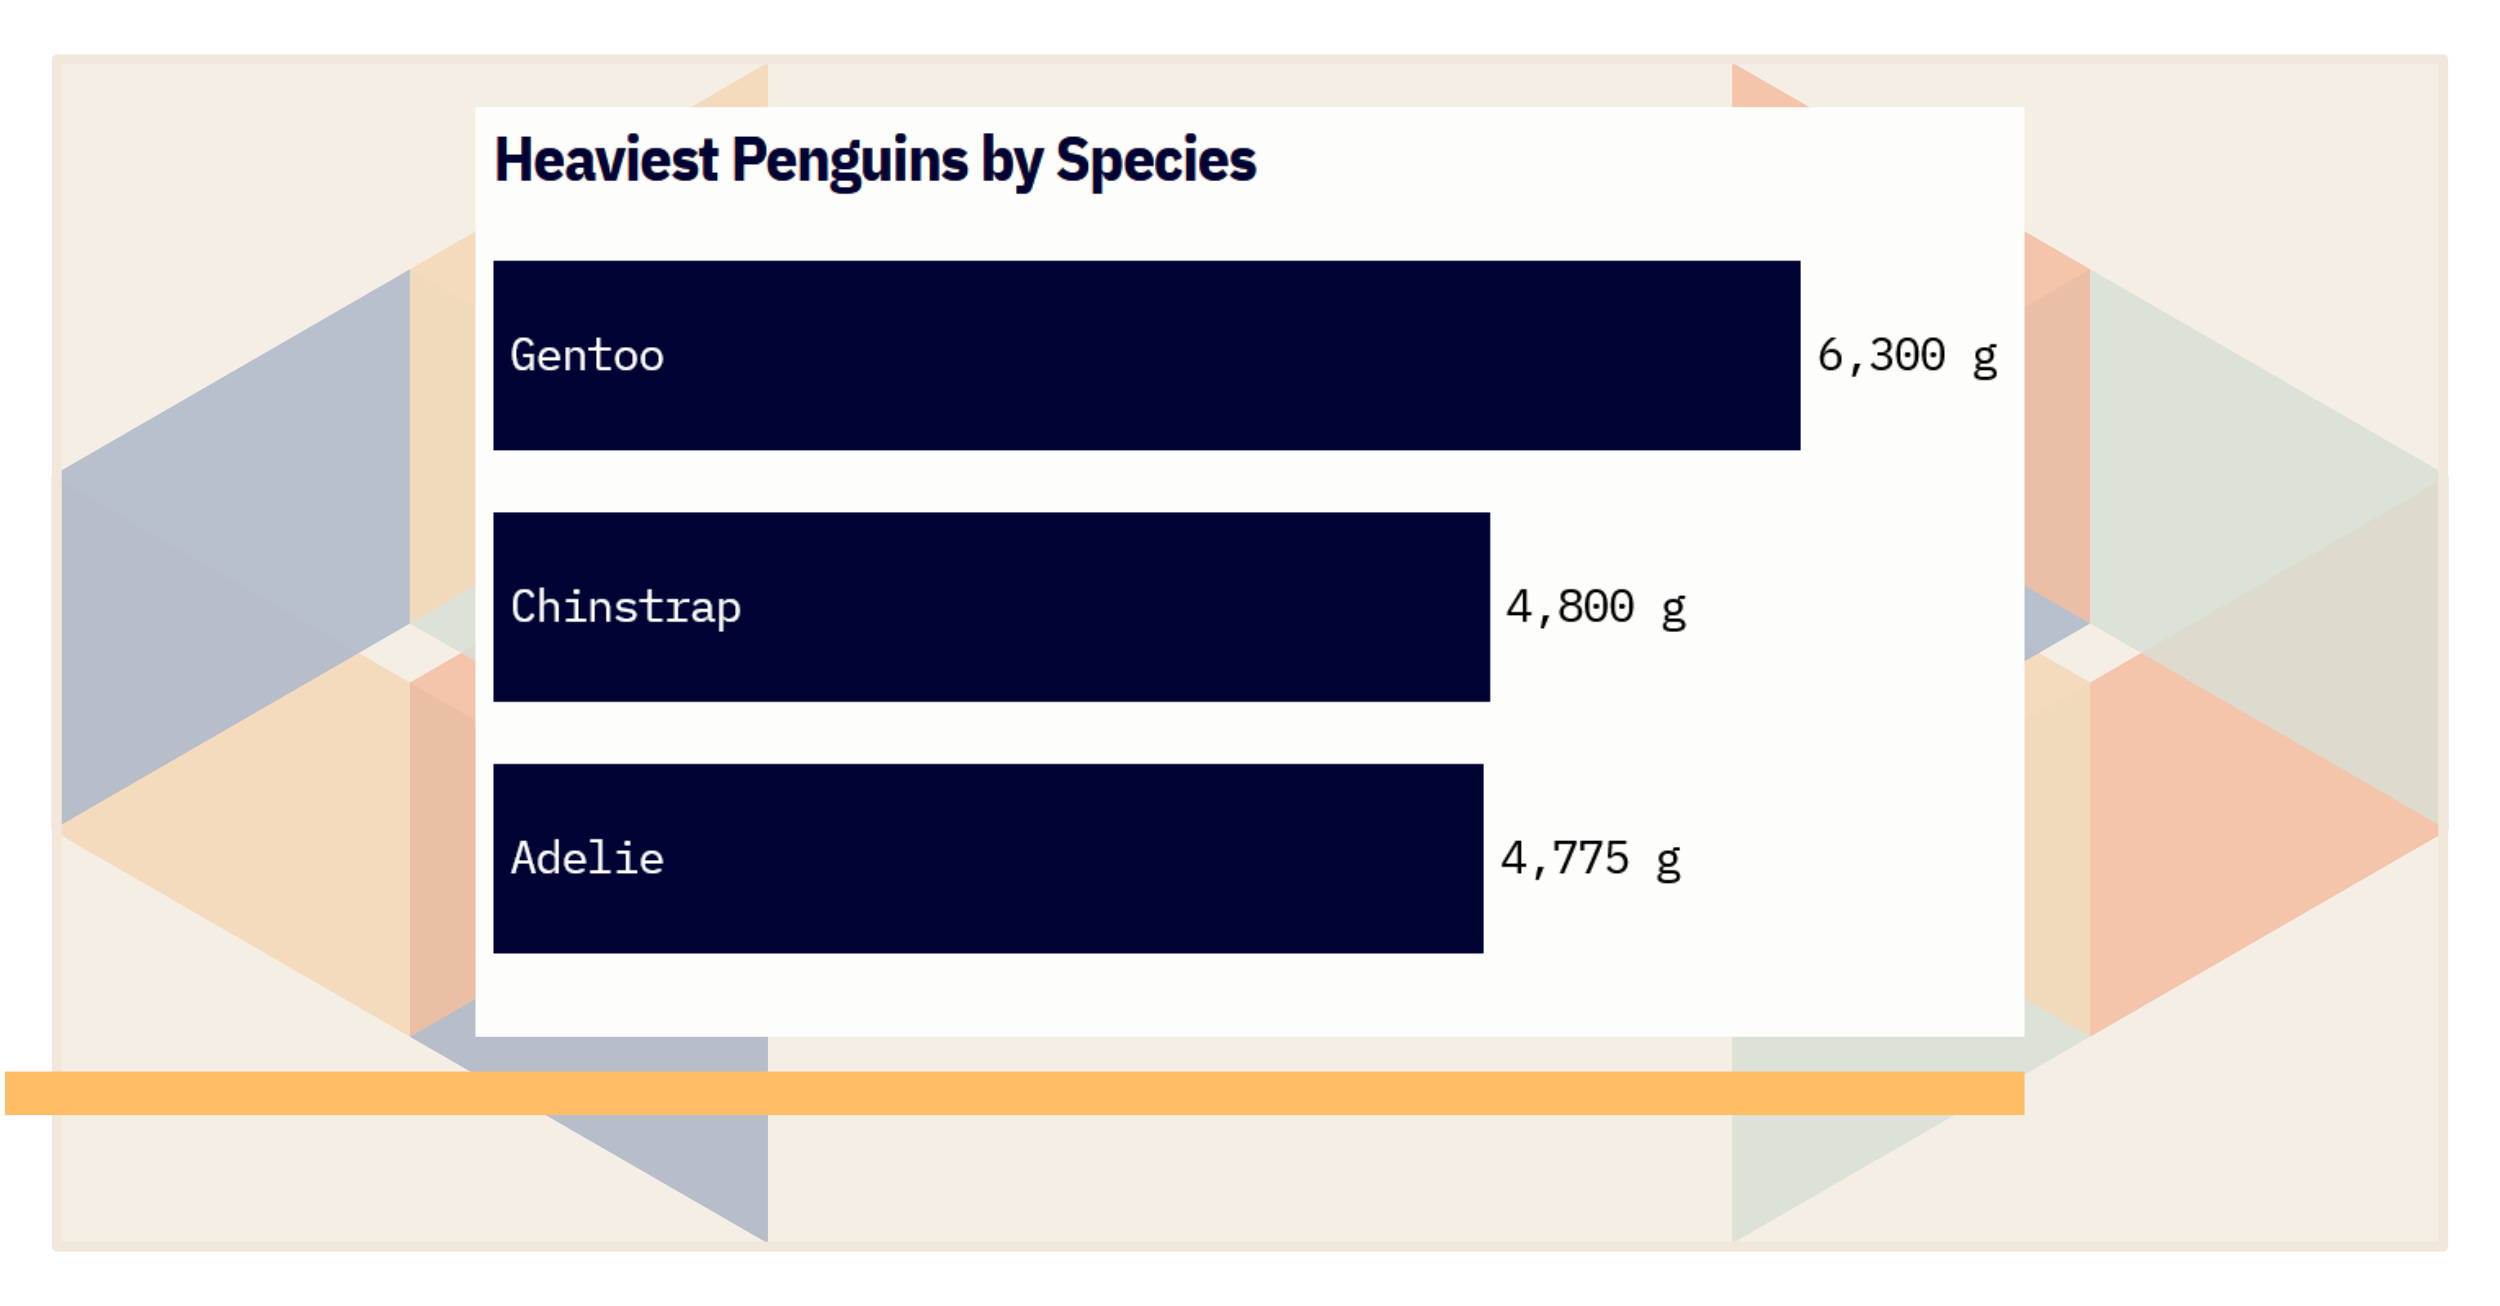
The second part demonstrates useful methods that let you characterize a dataset. Slice(), filter(), Set(), and map() are introduced with practical examples.
Data Wrangling in JS: 03 Advanced
The third part extends the basic methods that let you characterize a dataset. Reduce() and sort() are introduced. Map() has a reprise with some fundamental data wrangling applications.
Conventions
A lot of Accordions. I mean these things:
I'm an Accordion!
Overview first, details on demand.
You decide how much you want to read.
Some of these contain links to further resources. Others contain some advanced examples. If you ignore all of them you will still get the main message of what each post is trying to say.
So feel free to just skim through the main texts, or go through the Bonus-Parts as well.
How to run the code
Since every line of code in this series is plain vanilla JavaScript, you can actually just run it the browser that you are using right now to read this — and I think that’s beautiful! Your browser is well equipped by default.
If you’re reading this on mobile that’s fine too, but I assume you won’t plan on running any code then.
So, there are two ways I recommend to run the code examples: the console or REPLs.
1: In your console
If you never opened the console of your browser before, I encourage you to try this right now (tested on Firefox and Chrome): press Shift + Ctrl + I.
This brings up your developer tools, of which there are many.
In the top row select the Console tab and then copy & paste the following alert code and press Enter.
Stop, I use Mac OS!
If you’re trying to do this on a Mac for the first time, it is slightly harder. Here are the steps you need to take:
- Click on the Safari menu in the top-left corner of the screen.
- Select “Preferences” from the dropdown menu.
- In the Preferences window, click on the “Advanced” tab.
- At the bottom of the Advanced tab, check the box next to “Show Develop menu in menu bar”.
- Close the Preferences window.
- Now you should see a new menu item “Develop” in the top menu bar. Click on it.
- From the Develop menu, select “Show Web Inspector” or press the shortcut key combination
Option + Command + I.
In the top row select the Console tab and then copy & paste the following code and press Enter.
alert('Hello world!');
Congrats, you’re now a hacker! If you’d rather be an accountant, feel free to use the console as a fancy calculator on any website :)
No, but seriously: you can run all the code snippets in your browser’s console like this. Just make sure you follow along and have fun.
Further resources on developer tools
2: In REPLs
If you’d rather have a more persistent scratchpad to run the code examples and maybe take some notes, then I recommend you try a Svelte REPL.
Here is what the one linked to above looks like:
In the most basic way you can think of it this way: the App.svelte allows you to combine three things in one place:
- you write JavaScript code in a script tag
<script>...</script> - you write HTML markup next to it and reference your JavaScript variables like
{this} - you write CSS declarations in a style tag
<style>...</style>
How to save your progress
If you want to preserve your precious notes, you can simply log in with your Github credentials. But you can also use it without logging in at all.
If you don’t want to log in, you can still download the current status of your REPL as a zip file.
If you want to run that zipped app locally and have no clue where to begin: This article called Svelte for new developers is still up to date and very concise.
If you want a longer version (albeit a bit older): The Mozilla Web Docs got you covered. Check out their guide Getting started with Svelte, which links to everything you need to get up to speed and adds commentary on most of the moving parts.
What is a REPL?
Glad you asked: REPL is short for Read–eval–print loop, which Wikipedia defines as “a simple interactive computer programming environment that takes single user inputs, executes them, and returns the result to the user”.
Frankly, a Svelte REPL is a little more sophisticated than that, because the user input is not very restricted.
You can define multiple components and build full apps within a Svelte REPL.
Go!
With all this out of the way: go ahead and read the first real post!